Onigiri
Contains allergens
Incomplete allergen information: some ingredients have not been reviewed yet. Always check the labels before cooking.
- Author
- Equipo Cocinoa
- Preparation time
- 108 min
- Servings
- 4
Summary
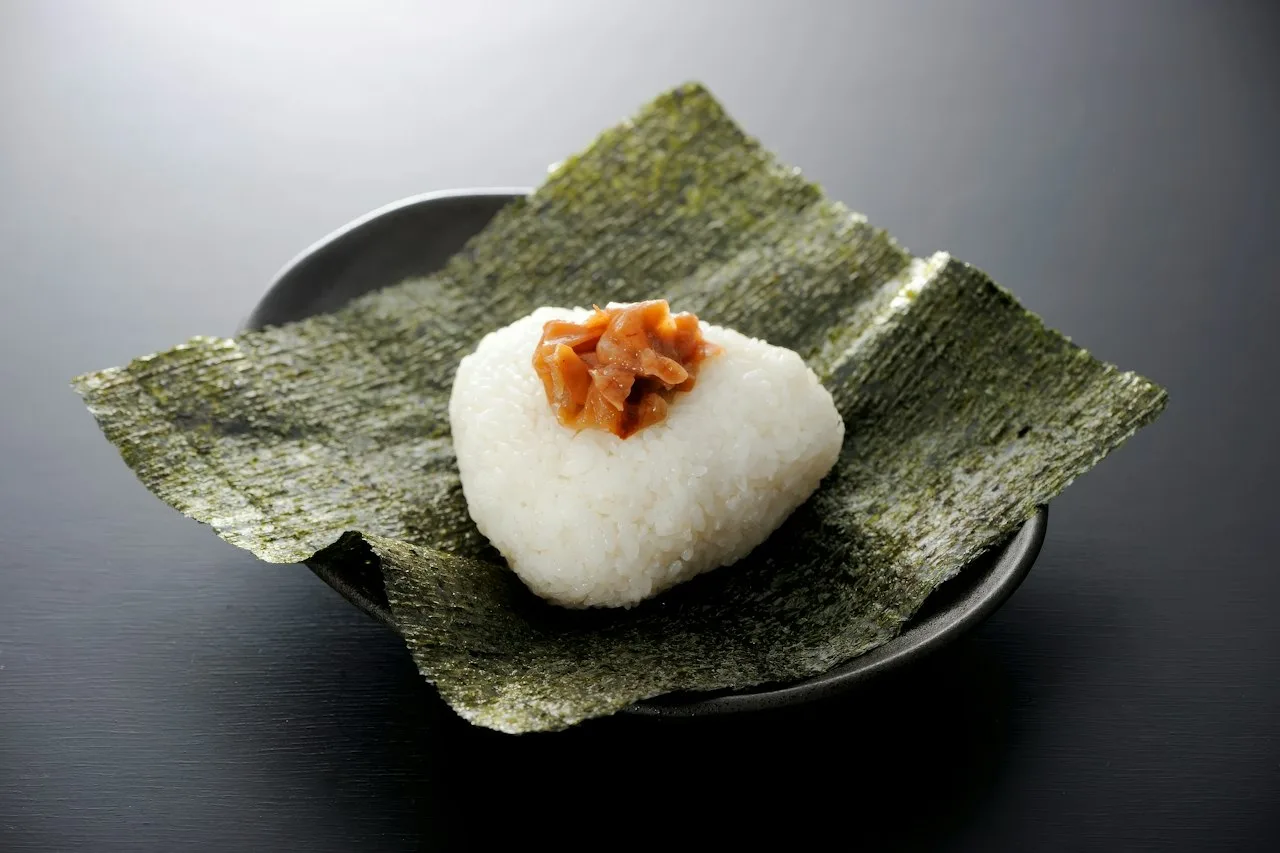
Japanese rice balls shaped by hand, salted on the outside with a heart of tuna mayo, grilled salmon or umeboshi, and wrapped in a strip of nori. Japan's best-loved snack, perfect for packed lunches.
Ingredients
- 150 g Salmon (one fillet, skin on)
- 120 g Tuna (tinned, well drained)
- 1 teaspoon Soy sauce
- 1 tablespoon Sesame seeds (toasted) (optional)
- Salt (about 2 teaspoons, for the salmon and your hands)
- 2 tablespoons Mayonnaise (Japanese if you can find it)
- 450 g Sushi Rice (or any Japanese short-grain rice)
- 540 ml Water (to cook the rice, plus a bowl for wetting your hands)
- 2 sheets Nori seaweed (cut into wide strips)
- 2 u Umeboshi (pickled plums) (pitted)
Instructions
Wash the rice in a bowl of cold water, rubbing it gently with your hand, and change the water until it runs almost clear. Drain, put it in a pan with the 540 ml of water and leave to soak for 30 minutes.
35 min
Cover the pan, bring to the boil and turn the heat down to the lowest setting. Cook without lifting the lid until the water is absorbed, then turn off the heat and leave to rest, covered, for 10 minutes. If you have a rice cooker, use it with the same amount of water.
25 min
Meanwhile, salt the salmon on both sides with a teaspoon of salt and leave for 10 minutes. Pat dry with kitchen paper and cook in a non-stick frying pan or under the grill for about 4 minutes a side, until opaque and lightly browned. Flake it, removing the skin and bones.
18 min
Mix the tuna with the mayonnaise and soy sauce. Chop the flesh of the umeboshi. Put each filling in a small bowl.
5 min
Turn the rice out onto a tray with a wet spatula, without squashing it, and let it cool until you can touch it without burning yourself. It should still be warm.
5 min
Wet your hands in the bowl of water and rub them with a pinch of salt. Take a handful of rice (about 110 g), flatten it in your palm, make a hollow in the centre and add a teaspoon of filling. Cover with a little more rice and close it up.
10 min
To shape a triangle, cup one hand into a roof shape and keep the other flat underneath. Press gently, turn the ball and repeat three or four times until it is firm with smooth sides. Wet and salt your hands again before each onigiri.
10 min
Wrap the base of each onigiri in a strip of nori just before eating so it stays crisp. To tell them apart, top each one with a little of its filling or a few sesame seeds.
Notes
In Japan, onigiri (also called omusubi) have been the go-to portable food for centuries, and today they are sold round the clock in convenience stores. You need Japanese short-grain rice, which is sticky; long-grain rice won't hold together. It isn't sushi rice: there's no vinegar, just the salt on your hands. Shape them while the rice is still hot, because cold rice no longer sticks, and press just enough for them to hold without packing them tight. If the rice is too hot to handle, use a piece of cling film, which is also more hygienic. Wrapping the nori just before eating keeps it crisp; if you put it on when shaping, it turns soft, which is how many families like it. Umeboshi is a Japanese plum pickled in salt, very sour and salty: half a plum per ball is plenty. Other classic fillings are kombu simmered in soy sauce or bonito flakes with a few drops of soy. Food safety: eat them the same day and don't leave them at room temperature for more than two hours; if you're packing them for lunch, keep them cool. The fridge makes the rice hard: if you have leftovers, warm them briefly in the microwave, covered, or toast them in a pan with a little soy sauce (yaki onigiri).
More information
Guide indicatorsDifficulty, quality and data reliability
Guide indicators
- Estimated difficulty51/100
- Recipe completeness60/100
- Nutrition reliability
- Medium
Calculated automatically from the ingredients, steps, time and community feedback. They are not a guarantee.
StorageKeeps 1 day in the fridge
I made this
Have you made it? Tell us how it went.
Community versions
Would you change something? Publish your version: it will link back to this recipe.
Comments
Log in to leave a comment.
No comments yet
Be the first to comment on this recipe.