Pav bhaji
Contains allergens
Incomplete allergen information: some ingredients have not been reviewed yet. Always check the labels before cooking.
- Author
- Equipo Cocinoa
- Preparation time
- 58 min
- Servings
- 4
Summary
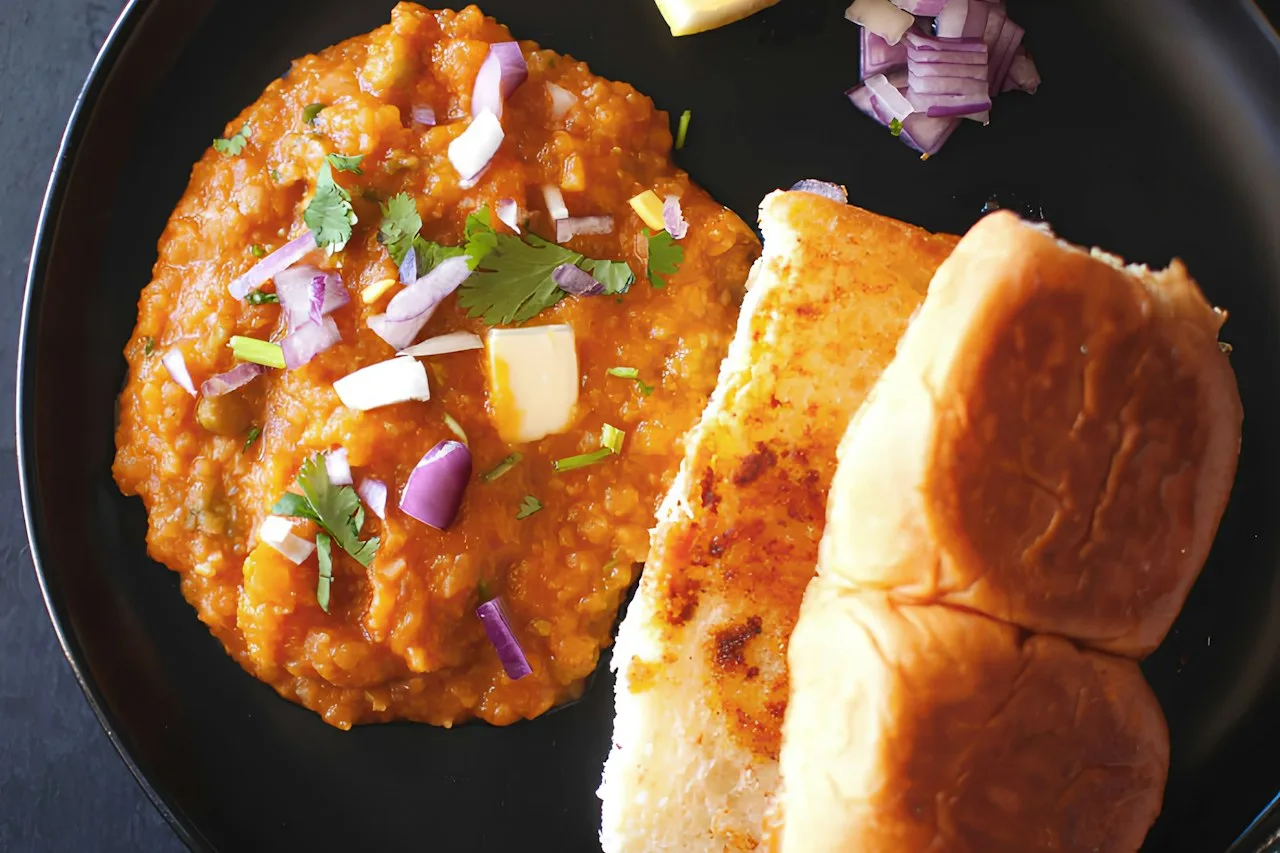
Mumbai's street-stall classic: a spiced mash of potato, cauliflower, peas, pepper and tomato, cooked with plenty of butter and scooped up with soft buns toasted on the griddle. Finished with raw onion, coriander and lemon.
Ingredients
- 100 g Butter (60 g for the bhaji and 40 g for toasting the buns)
- 4 u Tomato (ripe, chopped)
- 2 u Onion (1 chopped for the bhaji and 1 chopped raw to serve)
- 3 u Potato (medium (about 450 g))
- 1 u Lemon (in wedges)
- Salt (to taste)
- 1 u Green Chilli (chopped, to taste)
- 1 teaspoon Chilli Powder (Kashmiri, mild and deeply coloured)
- 1 handful Coriander (fresh, chopped)
- 1 u Green Pepper (finely chopped)
- 0.5 teaspoons Turmeric
- 1 tablespoon Ginger Garlic Paste
- 100 g Peas (fresh or frozen)
- 8 u Bread Rolls (pav: soft, milk-bread style rolls)
- 250 ml Water
- 200 g Cauliflower (in florets)
- 2 tablespoons Pav bhaji masala
Instructions
Boil the peeled, chopped potato, the cauliflower and the peas in salted water until very tender. Drain and mash with a potato masher until almost smooth.
20 min
Melt 40 g of butter in a large, deep frying pan and fry one of the chopped onions over medium heat until translucent. Add the ginger and garlic paste and the green chilli and cook for a minute.
7 min
Add the green pepper and cook until soft. Add the tomatoes with a pinch of salt and cook, pressing them down, until they break down completely into a paste.
10 min
Add the turmeric, Kashmiri chilli and pav bhaji masala, stir for a minute, then add the mashed vegetables and the water.
2 min
Mash and mix everything with the masher right in the pan and cook over medium-low heat, stirring often, until the bhaji is thick, rich and orange-red. Season with salt and finish with another 20 g of butter and half the coriander.
12 min
Split the buns in half without cutting all the way through. Melt the rest of the butter on a griddle or in a frying pan and toast the buns on both sides until golden and crisp outside and soft inside.
5 min
Serve the bhaji hot with the second onion chopped raw, the remaining coriander, a lemon wedge and the buns for scooping.
2 min
Notes
It was born in the mid-19th century as cheap fast food for the workers of Mumbai's textile mills, and street vendors mash it on a huge flat griddle with an iron masher. Pav bhaji masala is a blend of its own, with coriander, cumin, fennel, cinnamon, dried mango and chilli, sold in Indian shops; don't simply swap in garam masala, as the flavour changes a lot. Kashmiri chilli gives the deep red colour without too much heat. The butter is part of the dish: you can cut back, but don't leave it out entirely. For a vegan version, use oil and plant-based spread and dairy-free rolls. The bhaji keeps for 3 days in the fridge and freezes well; add a splash of water when reheating, as it thickens as it cools.
More information
Guide indicatorsDifficulty, quality and data reliability
Guide indicators
- Estimated difficulty52/100
- Recipe completeness60/100
- Nutrition reliability
- Medium
Calculated automatically from the ingredients, steps, time and community feedback. They are not a guarantee.
StorageKeeps 3 days in the fridge
I made this
Have you made it? Tell us how it went.
Seasonal recipes, every Friday
One email a week (in Spanish) with what's in season, the monthly challenge and three recipes to try. No account needed.
We'll ask you to confirm by email, and you can unsubscribe with one click. Privacy
Community versions
Would you change something? Publish your version: it will link back to this recipe.
Comments
Log in to leave a comment.
No comments yet
Be the first to comment on this recipe.